
Maraschino Cherry Roll Cake (Swiss Roll)
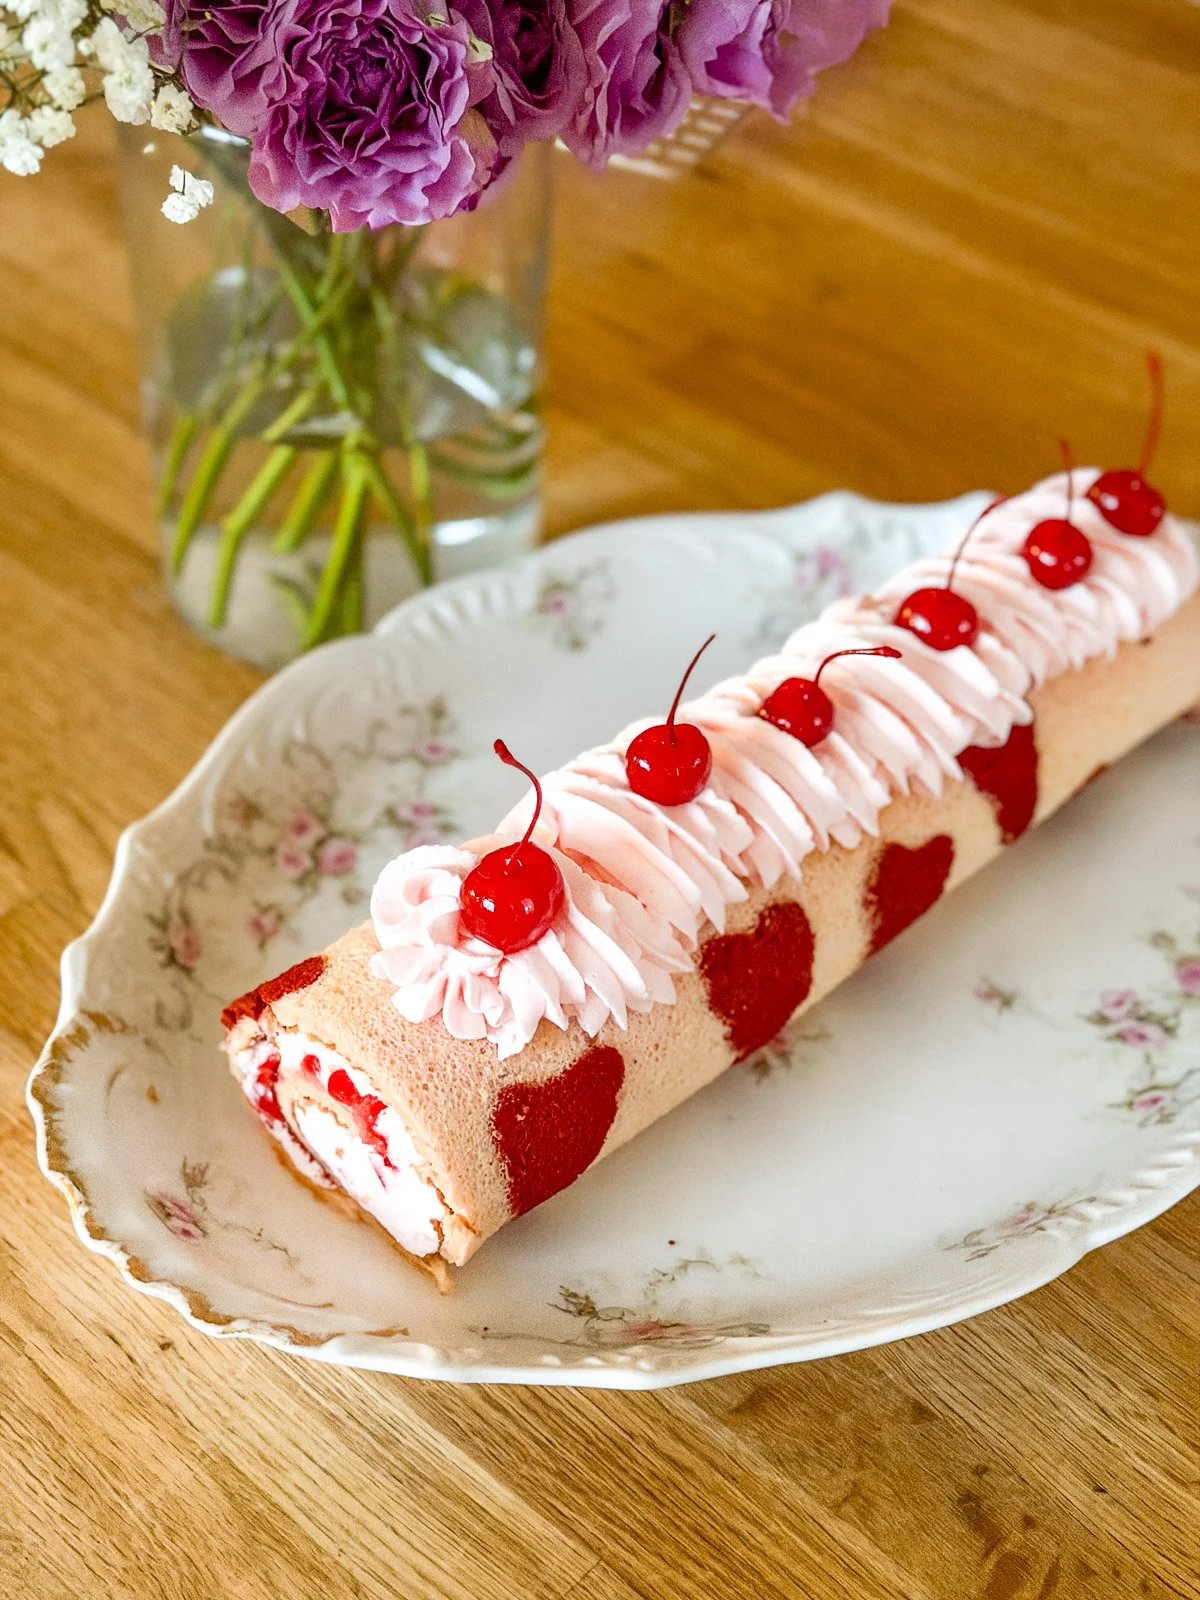
This Maraschino Cherry Roll Cake (Swiss Roll) is a nostalgic nod to classic cherry desserts, with a soft genoise cake wrapped around a light mascarpone mousse and sweet cherry filling. It leans more toward a French cake profile — airy, delicate, and lightly sweet — while still delivering that unmistakable maraschino flavor we love. It pairs beautifully with Valentine’s and Galentine’s celebrations, feeling playful, romantic, and just a little retro in the best way.
Rolling a cake can feel intimidating, but small cracks are completely okay. I tend to err on the lower side of baking time, which keeps the genoise pliable, and I haven’t had trouble with this recipe. And if a crack does appear, that’s where garnishes come in — a little whipped cream and cherries cover everything beautifully. I’ve also included an optional decorative step using a bit of reserved batter and food coloring, so you can pipe a design to your heart’s content before baking. Enjoy the process, embrace the imperfections, and savor every slice.
this recipe has been wildly adapted from a yule log cake I learned from Molly J Wilkinson - I learn so much about French pastry from her!
Ingredients for this Maraschino Cherry Roll Cake
For the cake
4 Eggs, separated
2/3 Cup Sugar, divided into 2
1/4 Cup Neutral Oil
1 Teaspoon Vanilla Extract (optional sub: Almond Extract)
1/4 Cup Milk
3/4 Cup Flour
3/4 Teaspoon Baking Powder
For the filling
1 Cup Mascarpone
2/3 Cup Powdered Sugar
1 Cup Heavy Whipping Cream
2 Tablespoons Cherry Syrup from jar of cherries
1 Teaspoon Almond Extract
Pinch of Salt
1/2 Cup Maraschino Cherries, chopped finely
For the Garnish
1/2 Cup Heavy Whipping Cream
1/4 - 1/2 Cup powdered sugar
1 tsp almond extract
1-2 Tablespoons Cherry Juice from Jar of Cherries
Maraschino Cherries with Stems
How to Make a Maraschino Cherry Roll Cake
Make the Genoise Cake
Preheat the oven to 350°F and line a rimmed half baking sheet with parchment paper.
Whisk the egg yolks with half of the sugar until pale and thick. Whisk in the oil, milk, and extract until smooth. In a separate bowl, whisk together the flour and baking powder, then gently mix into the yolk mixture until just combined.
In a clean bowl, whisk the egg whites until foamy. Slowly add the remaining sugar and whip until stiff, glossy peaks form. Gently whisk one-third of the egg whites into the batter to lighten it, then fold in the remaining whites with a spatula until no streaks remain.
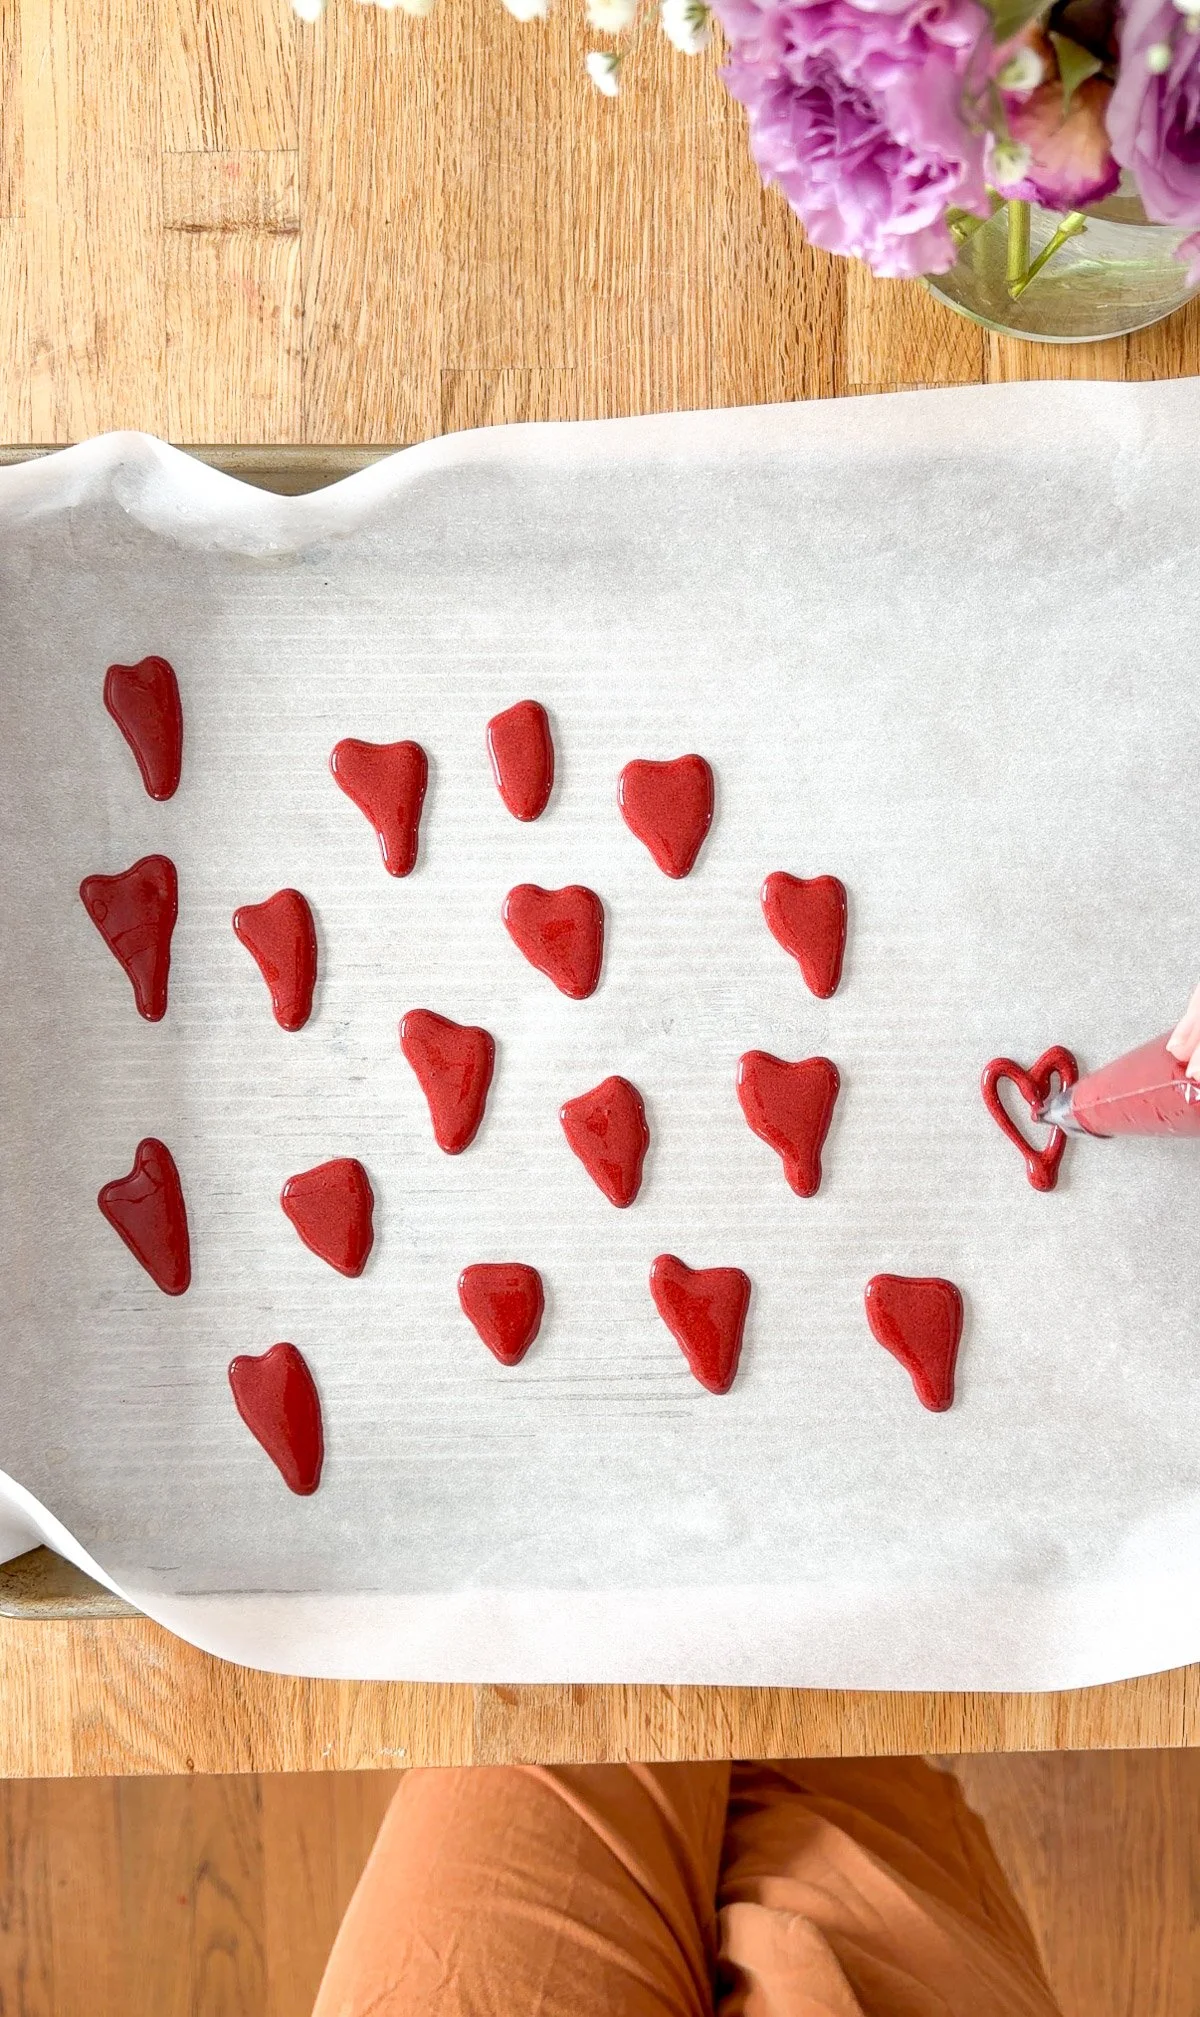
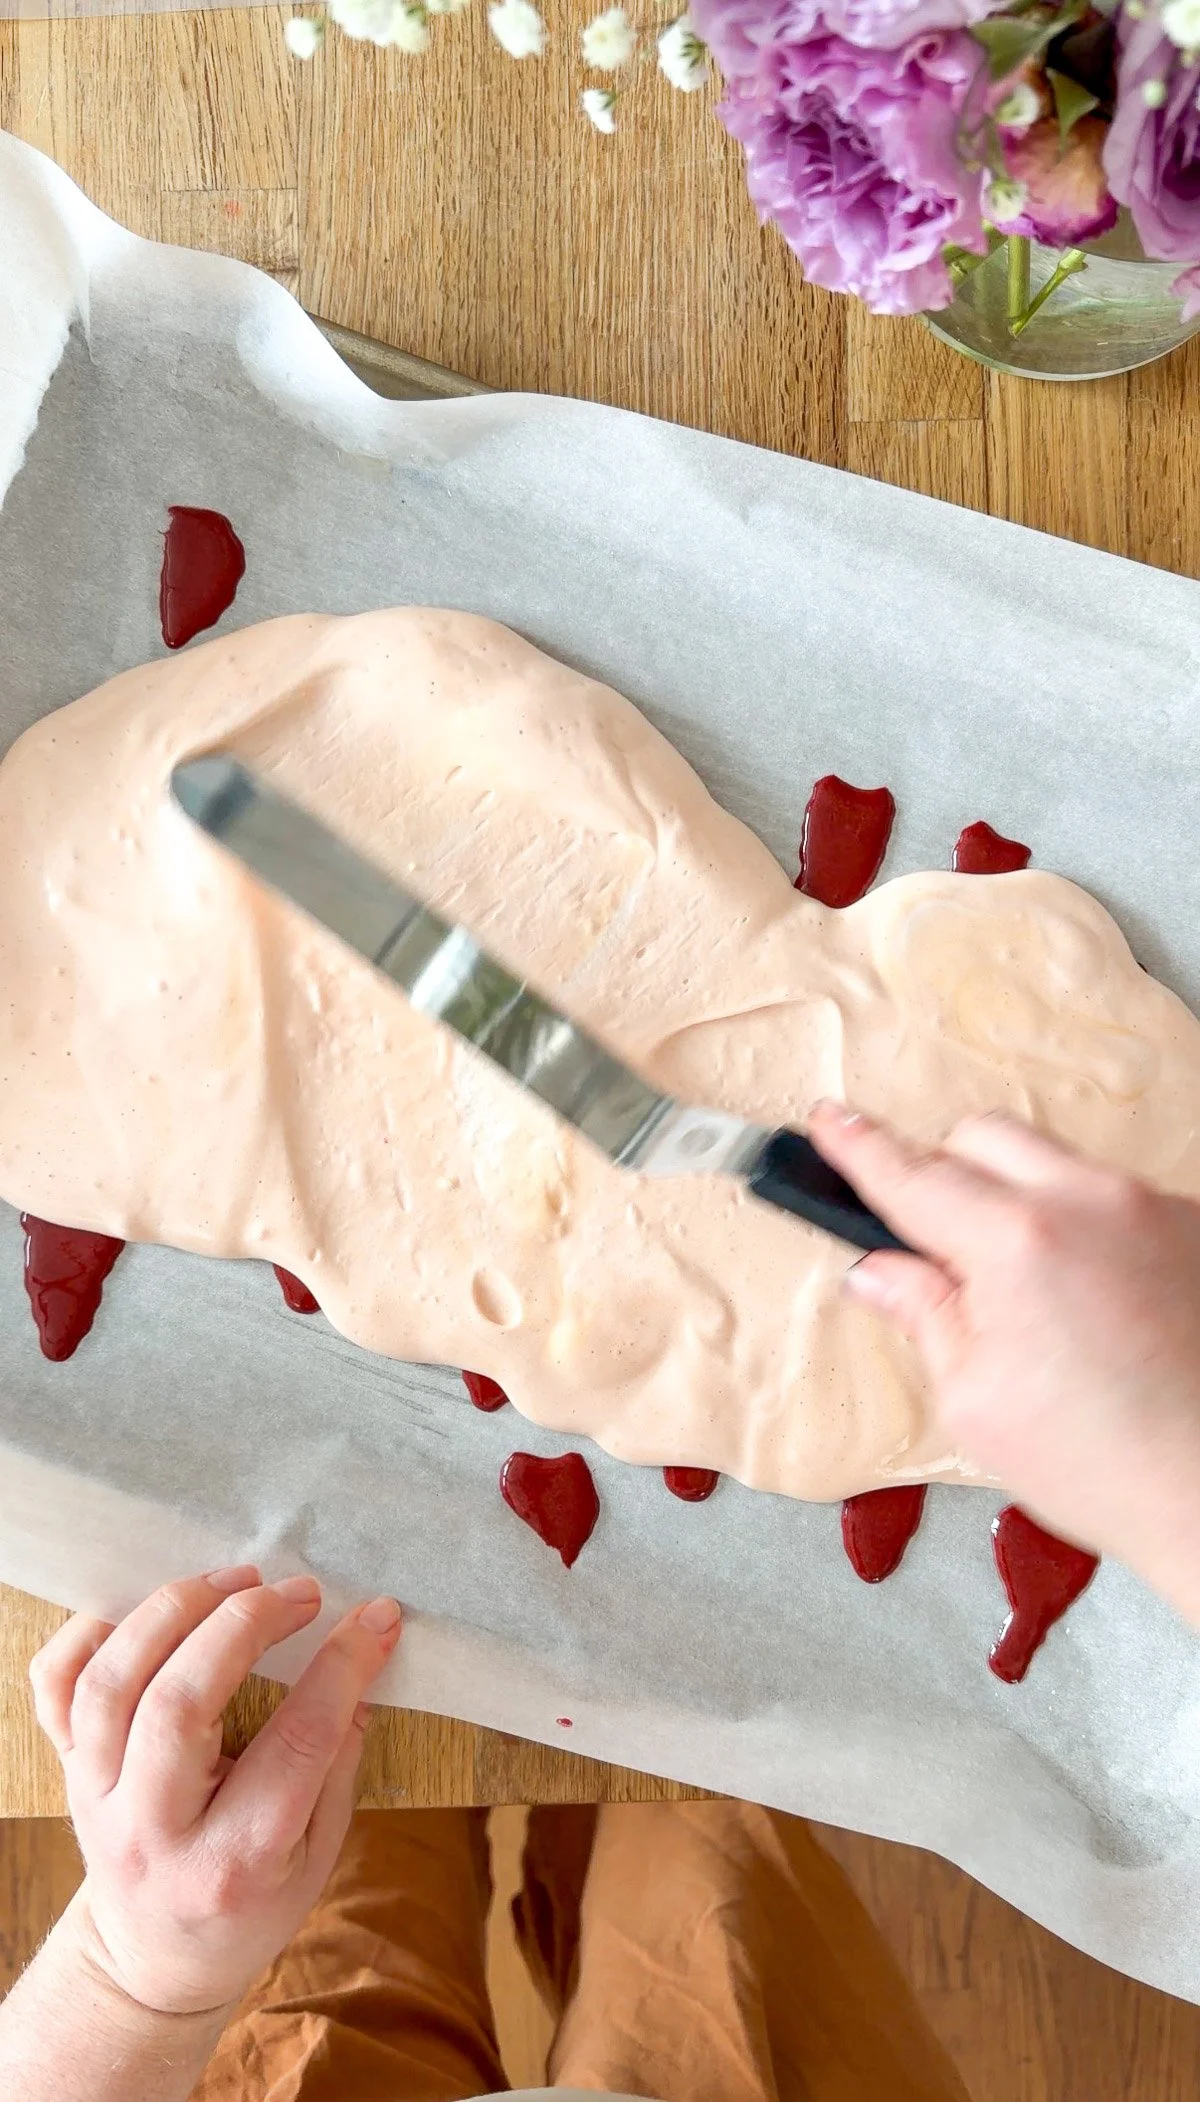
Optional design: Remove up to ½ cup of batter, tint with food coloring, and pipe a design directly onto the parchment. Freeze for 10–15 minutes before adding the remaining batter.
Pour the batter in a long line across the prepared pan and gently spread evenly with an offset spatula. Bake for 11–13 minutes, until set and lightly golden. Immediately cover with a clean damp cloth and allow to cool.
Make the Mascarpone Mousse
In the bowl of a stand mixer fitted with the paddle attachment, mix mascarpone, powdered sugar, almond extract, cherry syrup, salt, and heavy cream until light, fluffy, and smooth.
Assemble and Roll
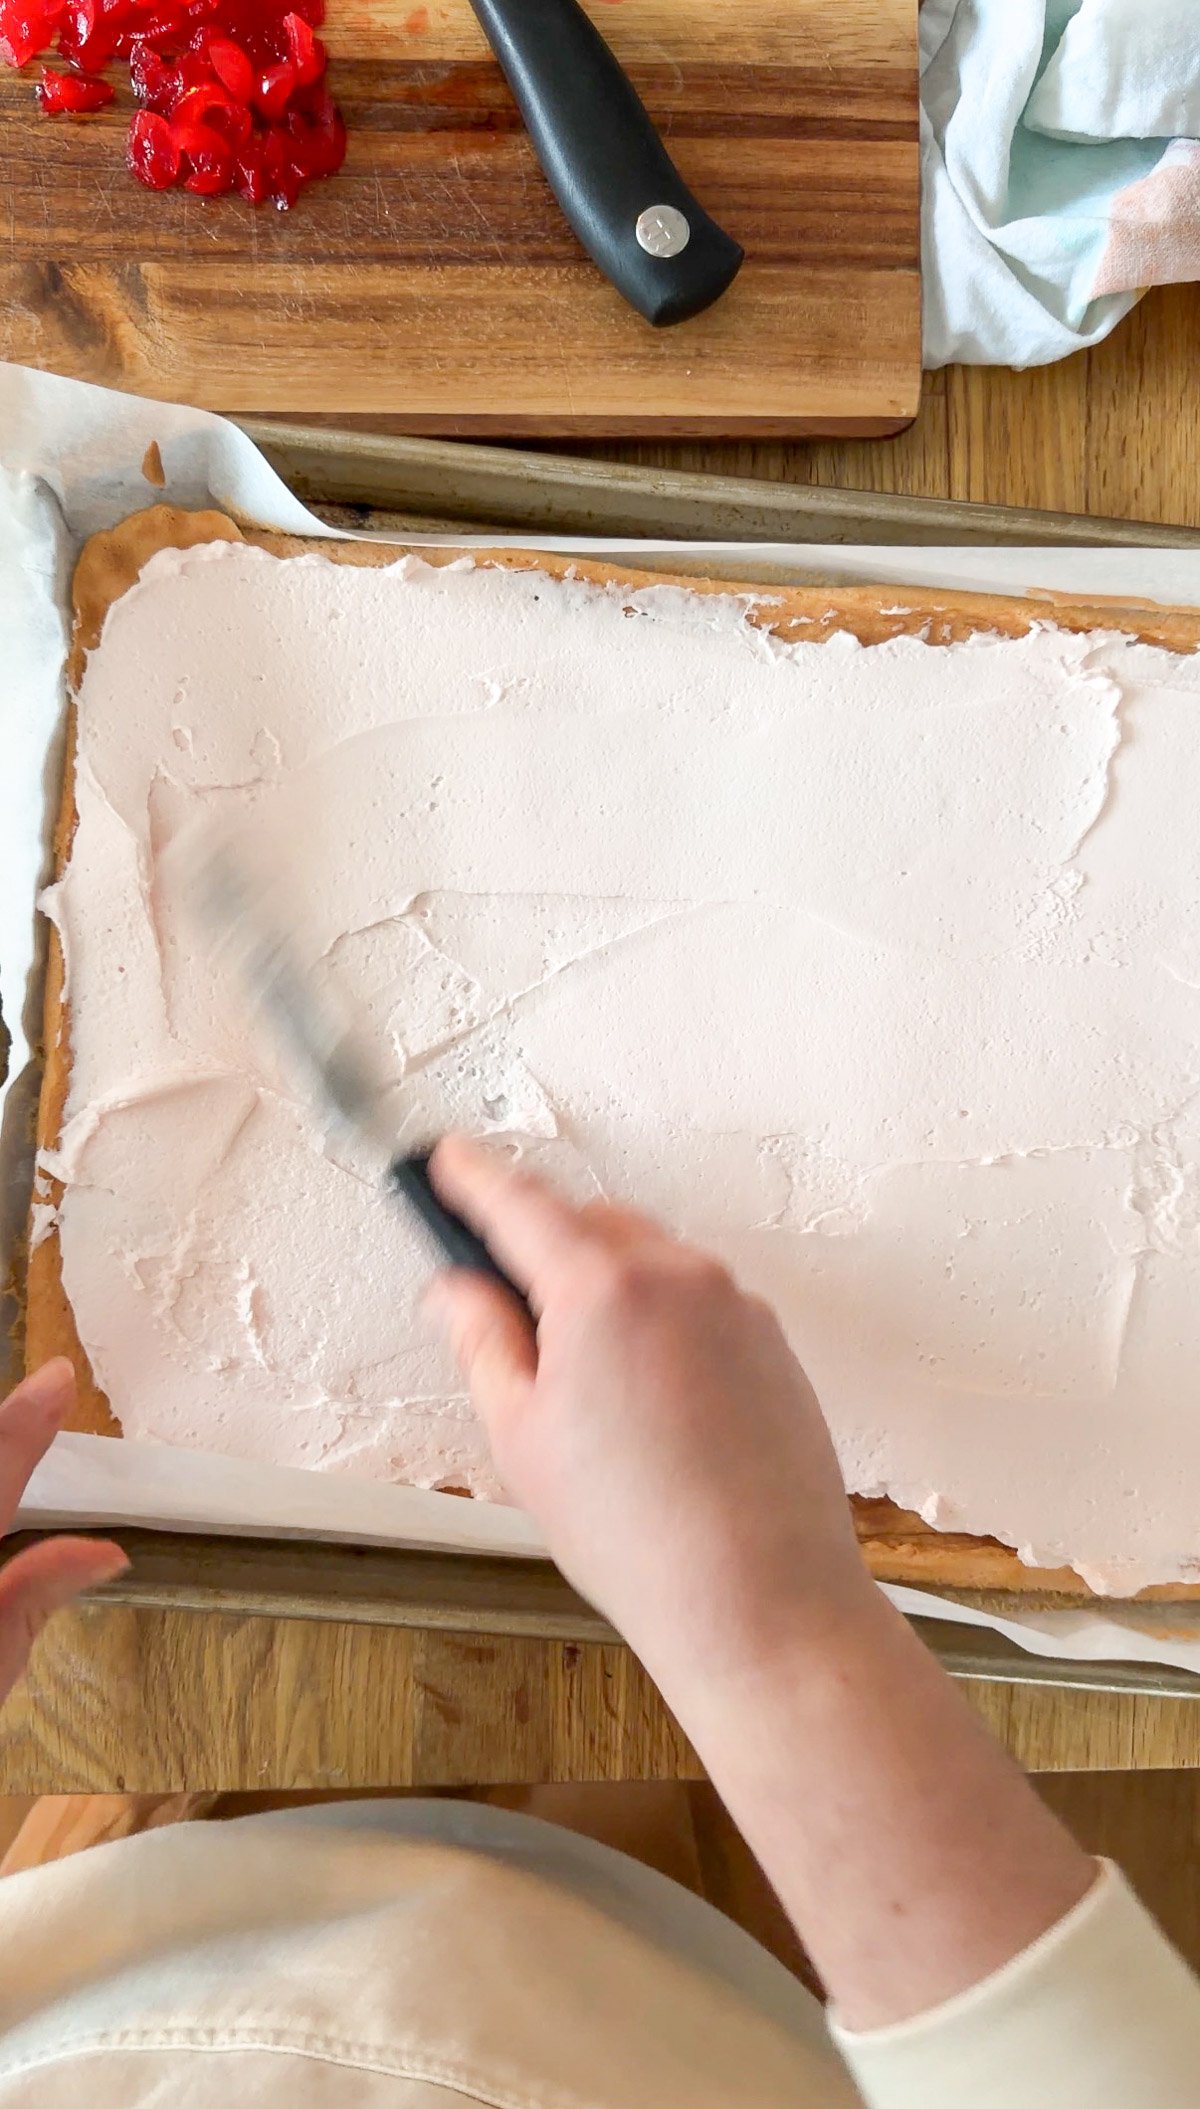
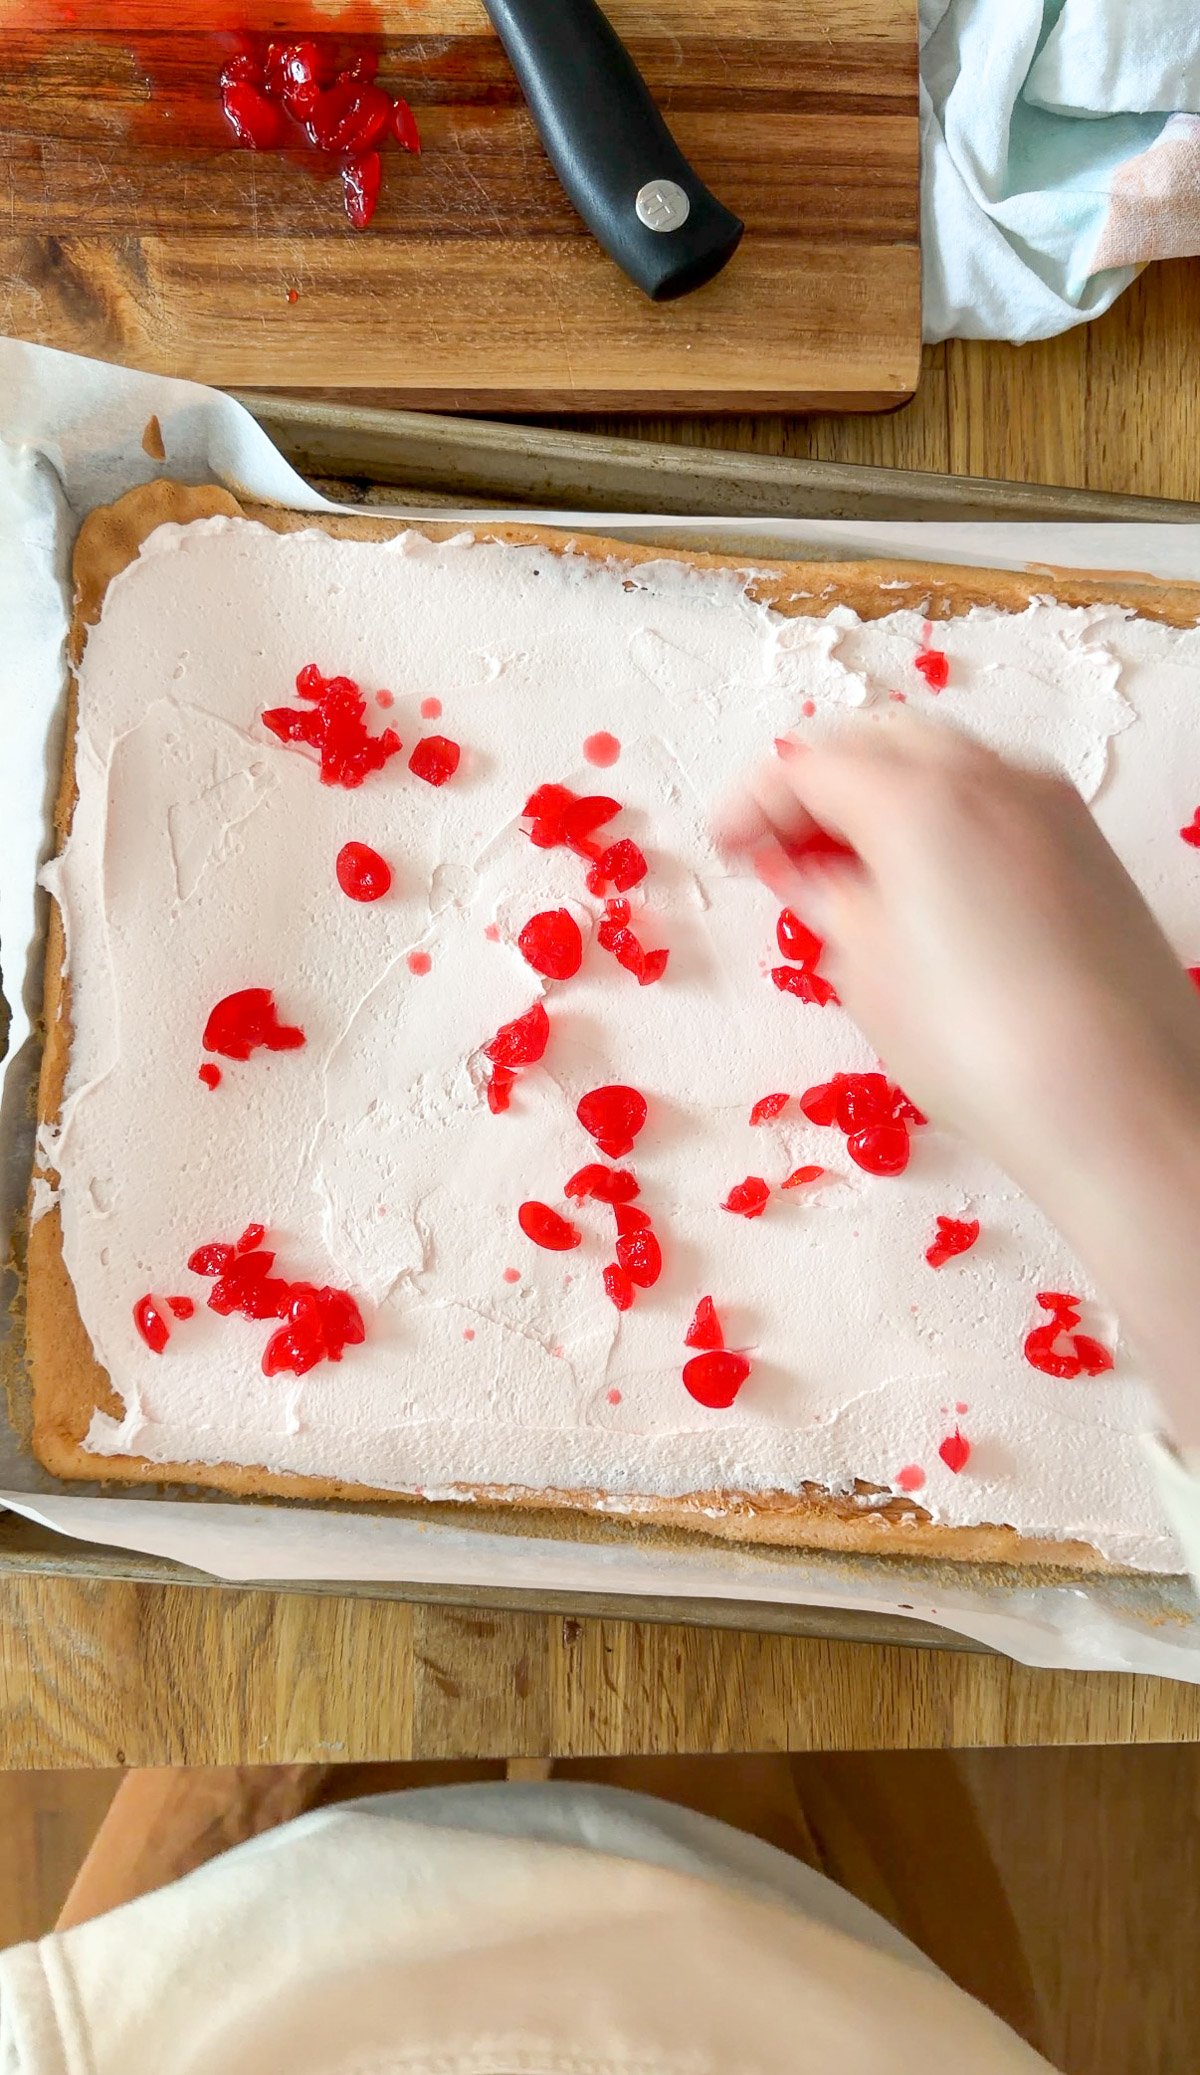
Once the genoise has cooled, transfer the cake (still on the parchment) to a clean work surface with the long side facing you. Spread an even layer of mascarpone mousse over the cake, leaving a 1-inch border along the far edge. Sprinkle evenly with chopped maraschino cherries, gently pressing them into the mousse.
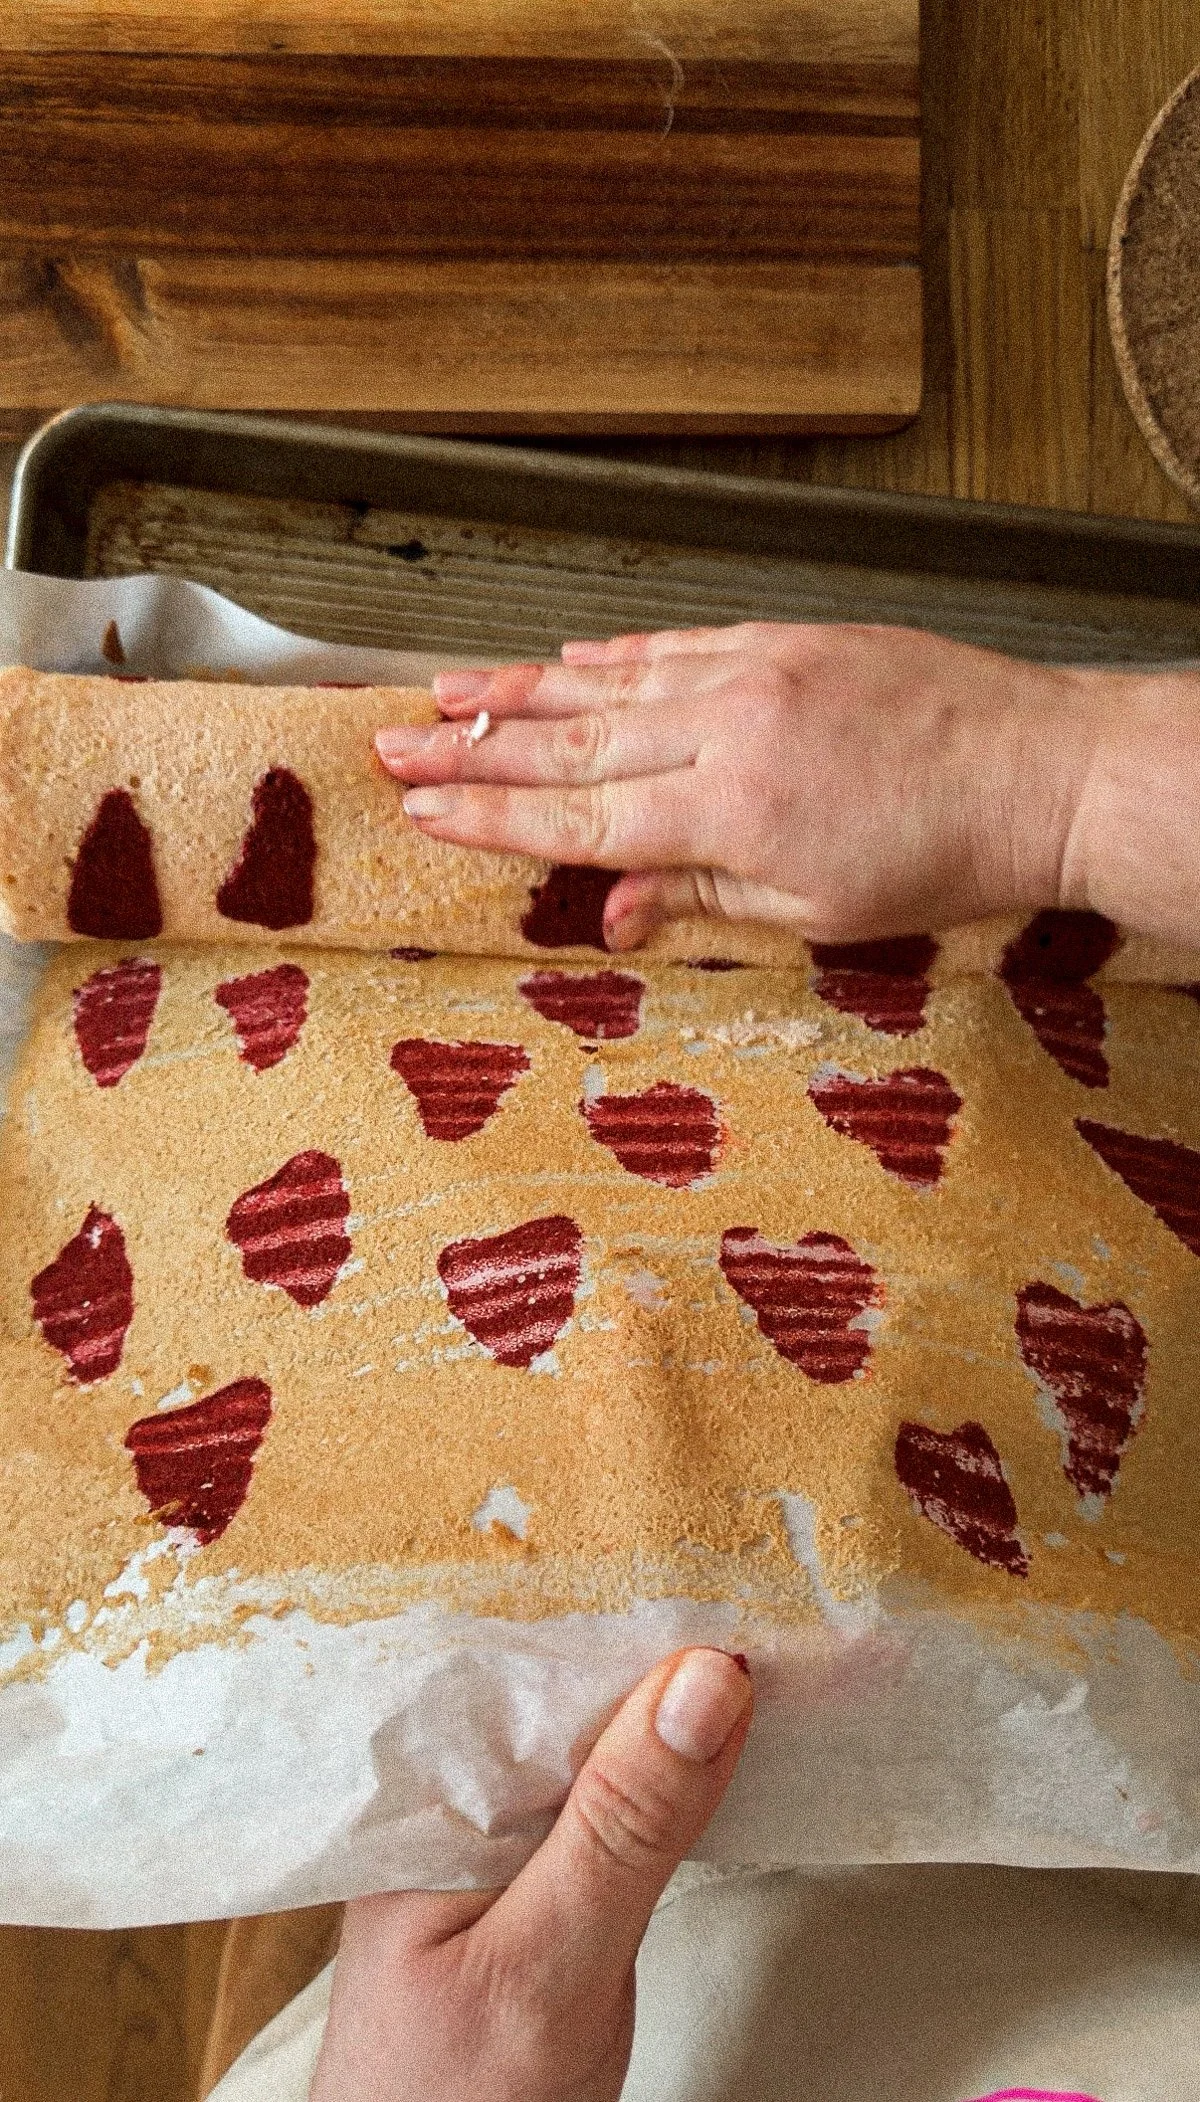
Starting from the long edge closest to you, lift the parchment and allow it to guide the cake as it rolls over itself. Use gravity to help the cake fold naturally, lifting and pulling the parchment away as you roll. Place seam-side down, wrap snugly in parchment, and chill for at least 30 minutes to set.
Garnish
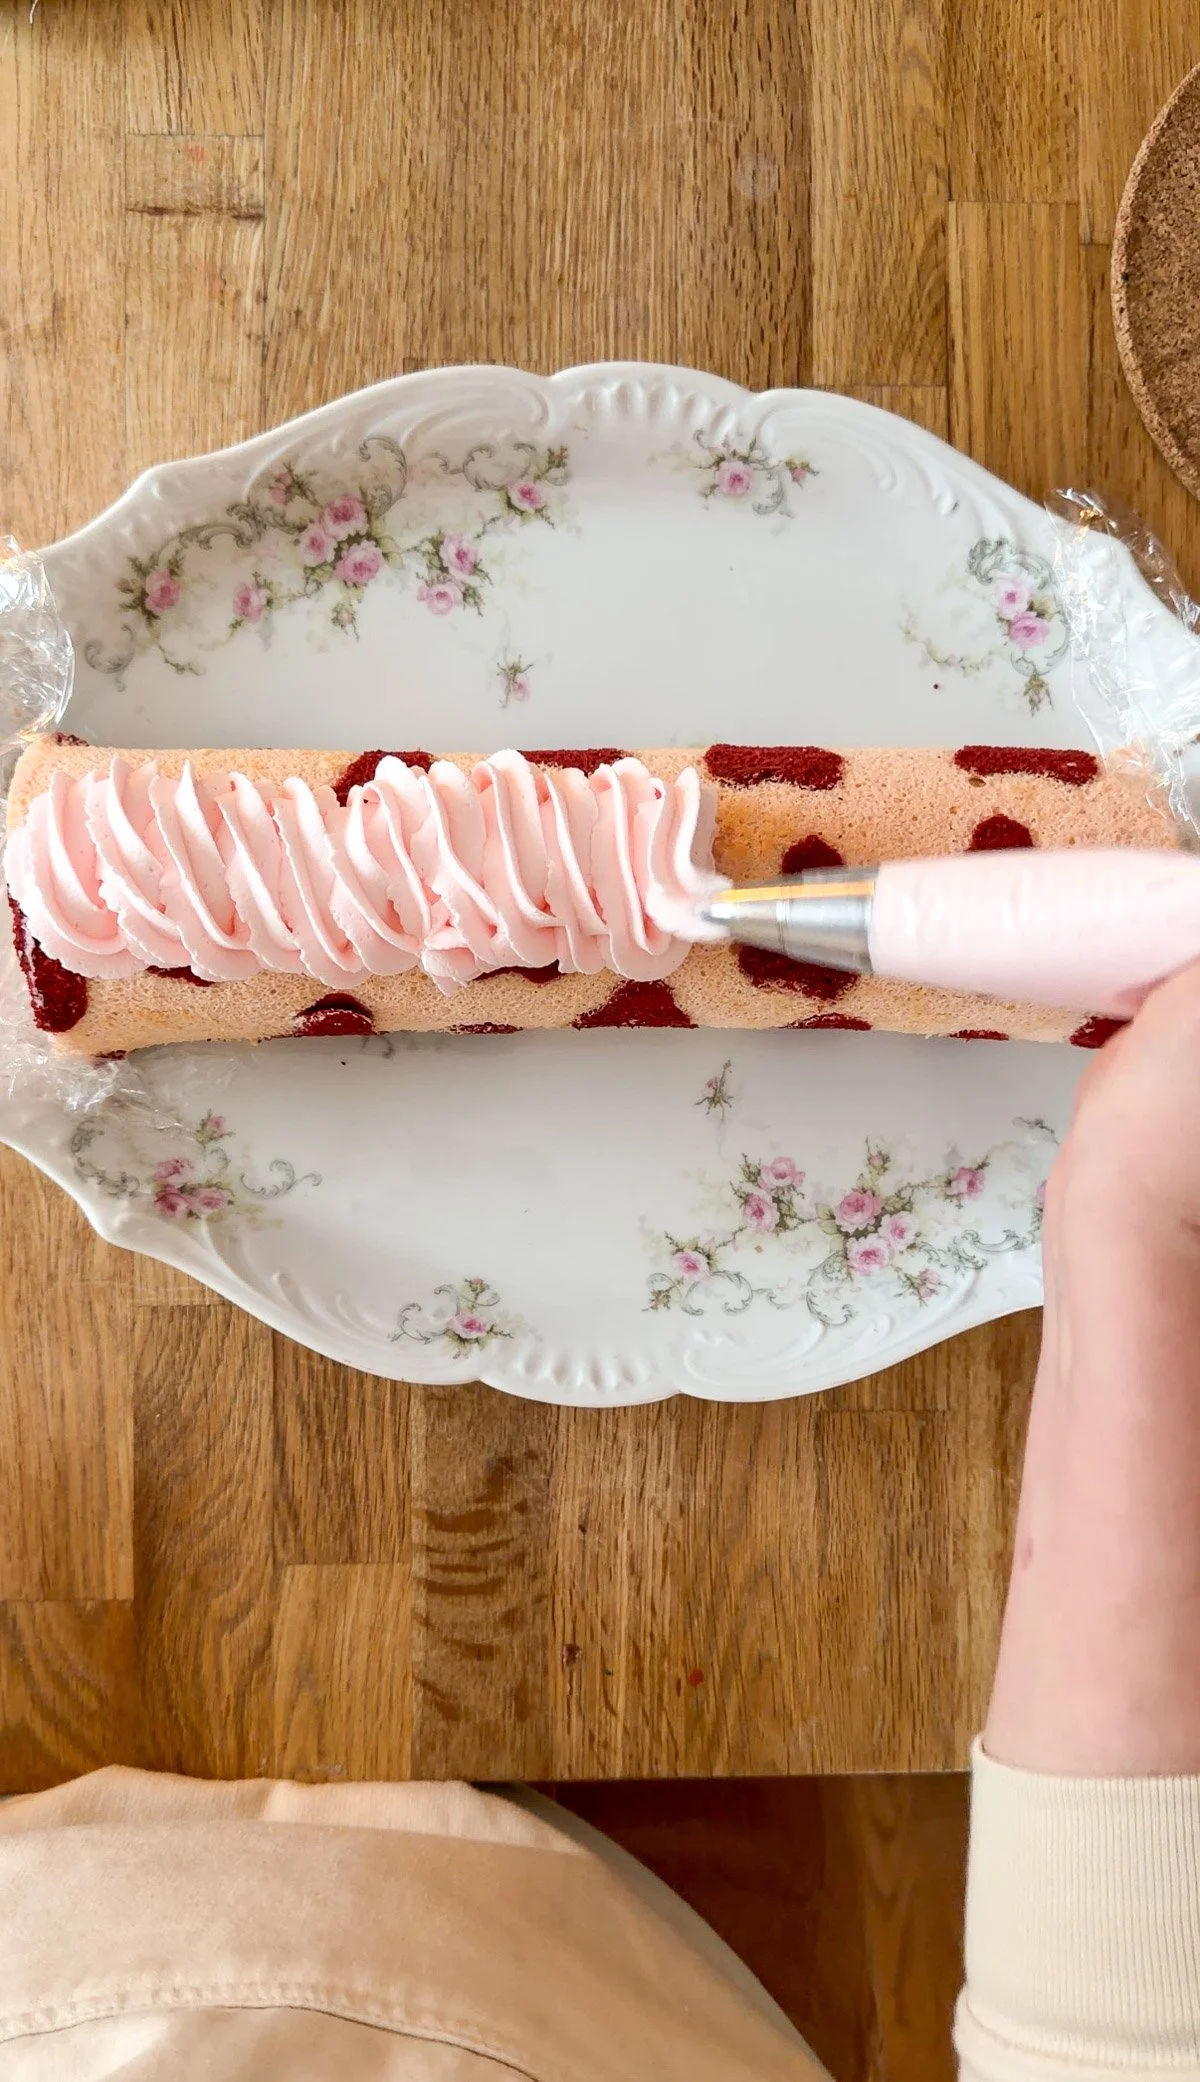
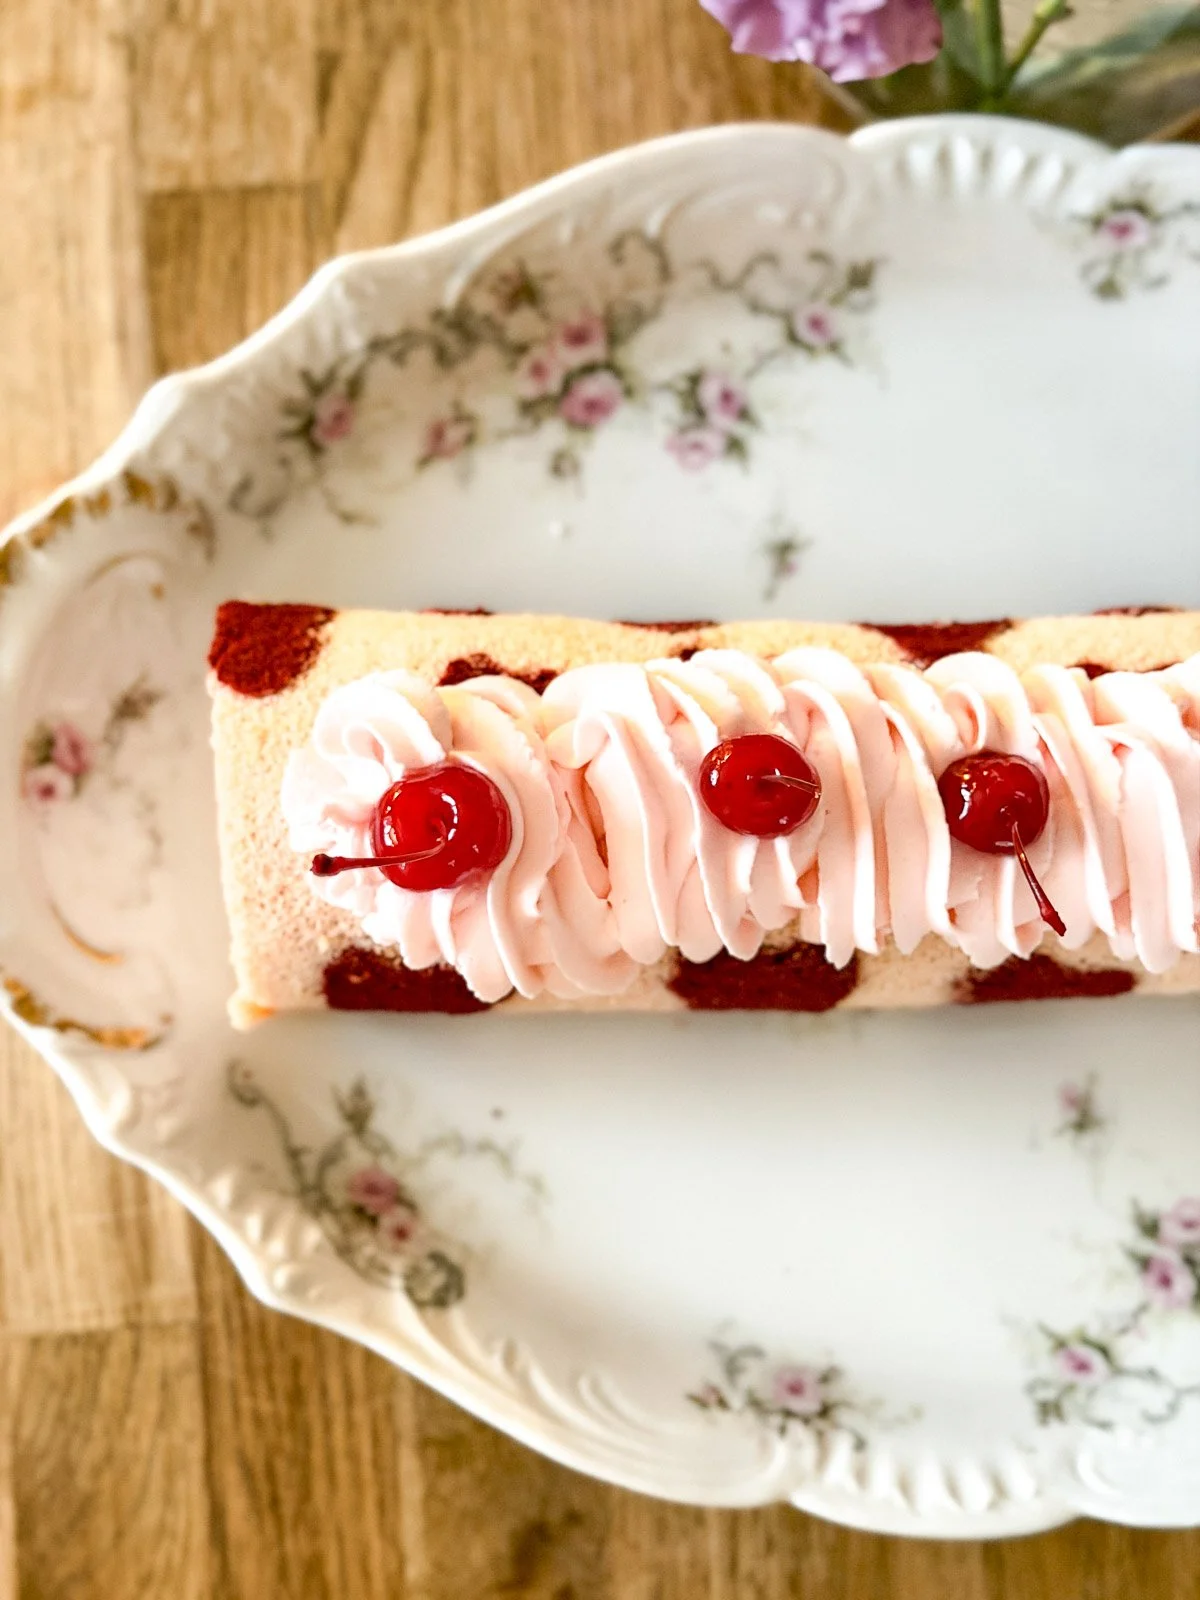
Whip heavy cream with powdered sugar, cherry juice, and almond extract until light and fluffy. Pipe soft swirls along the top of the cake and finish with maraschino cherries.
Baker’s Notes
Don’t over-bake the genoise. Erring on the lower side of the baking time keeps the cake soft and pliable, making it much easier to roll without cracking. A lightly set center is better than a dry one.
Small cracks are okay. Even experienced bakers get a crack now and then. Garnishes like whipped cream, piped details, or cherries are there for a reason — they cover imperfections beautifully.
Use the parchment and gravity. Let the parchment guide the roll and allow the cake to fold naturally rather than forcing it. Gentle hands make all the difference.
Optional design tip. If adding a piped design, freeze the piped design briefly before spreading the remaining batter. This helps the design stay crisp and defined as the cake bakes.
Chilling helps set the roll. Once rolled, chilling the cake for at least 30 minutes helps it hold its shape and makes slicing cleaner.
Storing the cake. This roll cake can be stored in the refrigerator for several hours or up to 2 days. For longer storage or if garnished, wrap the entire cake tightly in plastic wrap to prevent drying out. If chilling for just a few hours, covering each exposed end with a square of plastic wrap is usually sufficient.
Equipment
I love using these half sheet pans (for cakes, veggies etc!)…the cost per use in my kitchen is very, very low!
However, chances are, you might already have everything you need to bake—but just in case, you can check out all my favorite baking essentials here in my ShopMy.
Hope you enjoy this! Many of the links in my posts—or found here on ShopMy—may provide me with a small commission and can also lead to sponsorship opportunities. You can also support my work by buying me a coffee. Know your presence and support is received with so much gratitude.