
How to Cream Buttercream Properly
A Texture Guide for Beginners
Most buttercream problems aren’t caused by the recipe or the mixer — they’re caused by stopping too soon, rushing the process, or not knowing what you’re actually looking for.
Buttercream is less about equipment and more about texture. Once you understand what properly creamed buttercream looks and feels like, you can make it successfully with a stand mixer, a hand mixer, or even a sturdy bowl and spoon. This guide is about learning that texture — so you know when to keep going, when to stop, and how to adjust along the way.
What “Creamed Properly” Actually Means
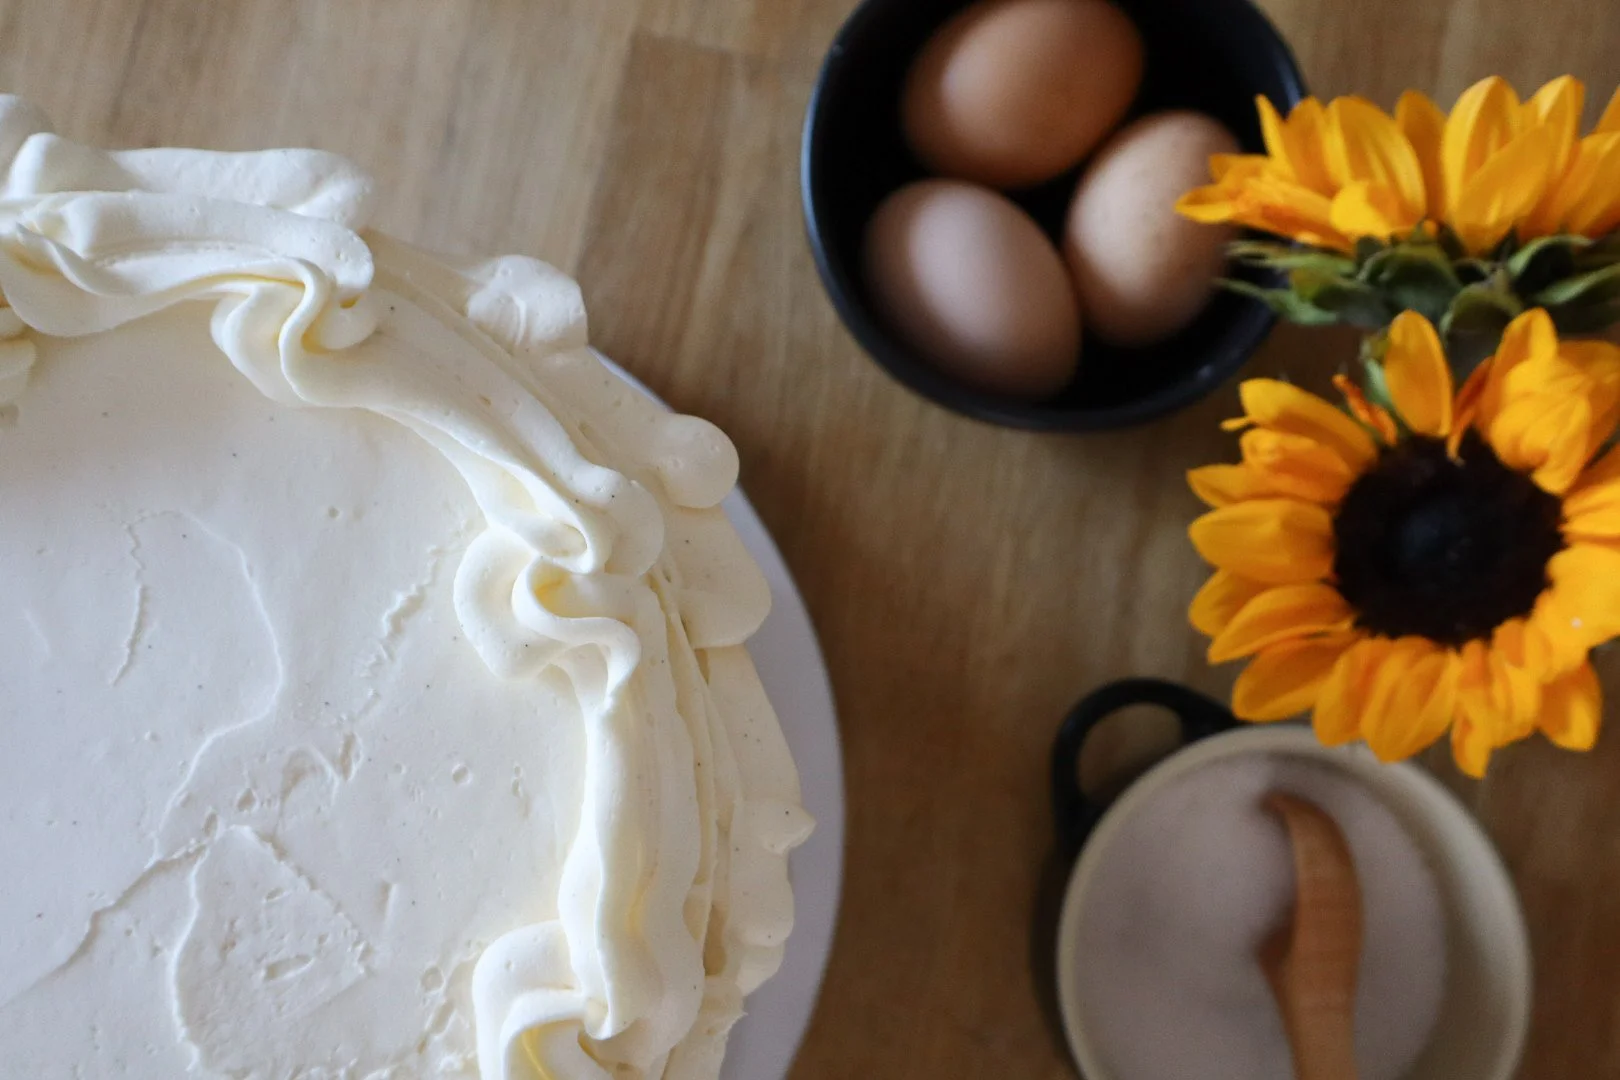
When buttercream is properly creamed, it should be:
light in color (noticeably paler than the butter you started with)
smooth, not grainy
soft but structured
easy to spread without tearing the cake
able to hold soft peaks without feeling stiff or heavy
If your buttercream feels dense or is difficult to work with it’s usually a sign that it hasn’t been creamed long enough — or that one step was rushed.
Ingredients (With Texture Notes)
This guide uses a classic vanilla buttercream, but the principles apply broadly.
Butter
Use unsalted butter that’s soft but cool. When you press it with your finger, it should give easily without feeling greasy or collapsing. Butter that’s too cold won’t cream smoothly; butter that’s too warm won’t hold structure.
Powdered Sugar
Sift it. This matters more than people think. Sifting removes lumps that can create a grainy texture later.
Cream or Milk
This adjusts texture, not flavor. Add gradually.
Vanilla & Salt
Salt is essential — it balances sweetness and sharpens flavor. Even a small pinch makes a difference.
Step 1: Cream the Butter Alone
This is the most overlooked step — and the most important.
Before adding anything else, mix the butter by itself until it looks:
lighter in color
fluffy
slightly increased in volume
This can take longer than you expect, especially if you’re new (or perhaps in a hurry before guests arrive for your dinner party). Scrape down the bowl once or twice and keep going.
If you’re using a hand mixer, this step is especially important. The butter needs time to soften and aerate before sugar is added.
What you’re looking for:
Butter that looks whipped, not dense or chunky but slick. It should hold gentle ridges when you stop mixing.
Step 2: Add Sugar Slowly
Add the sifted powdered sugar gradually, mixing well between additions. To avoid a sugar cloud, stop mixing all together and add the sugar one cup or so at a time, then mix on low until incorporated.
At this stage:
the mixture will thicken
it may look dry or stiff briefly — this is normal
resist the urge to add liquid too soon
Once all the sugar is incorporated, scrape down the bowl and continue mixing. This is where buttercream often improves dramatically with just a little more time.
Step 3: Adjust the Texture
Now you fine-tune.
Add:
vanilla
salt
cream or milk, one tablespoon at a time
Mix until the buttercream becomes:
smooth
cohesive
easy to spread
Stop frequently and look at it. Spread a small amount on a plate or spatula. If it drags or cracks, it needs more mixing or a touch more liquid. This can take anywhere between 8 - 10 minutes. Trust me, it’s worth it.
How Long Should You Cream Buttercream?
Longer than most beginners think — but not endlessly. It’s worth talking more about.
Properly creamed buttercream usually takes:
7–10 minutes total, depending on the mixer and butter temperature
You’ll know you’re there when:
the color has lightened
the texture looks whipped, not dense
the buttercream feels lighter when you lift the spatula
If it looks good, stop. Buttercream doesn’t benefit from aggressive overmixing once the texture is right.
Can You Cream Buttercream with a Hand Mixer?
Yes — absolutely. You can make buttercream with a hand mixer, and I’ve found success with just a whisk and spoon!
A hand mixer works well, especially for small to medium batches. The key differences are:
it may take slightly longer
you’ll need to stop and scrape the bowl more often
paying attention to texture matters more than timing
If you’re using a hand mixer and your buttercream looks dense or grainy, keep going a bit longer before adjusting ingredients. My advice here is that time and patience matter more than power.
Common Buttercream Problems (And How to Fix Them)
Grainy Buttercream
Usually caused by butter that was too cold, the sugar was added to quickly and/or wasn’t fully incorporated. Keep mixing and allow the butter to warm slightly.
Too Sweet
Add a pinch more salt. The salt though is frosting’s best kept secret!
Too Stiff
Add cream or milk a teaspoon at a time and continue mixing until smooth. Or, you can take 1/4-2/3 a cup of the frosting, melt in the microwave for 30 seconds and mix in. This warmer liquid frosting will mix in well and soften the whole batch.
Too Soft
Chill briefly, then re-mix. Buttercream firms as the butter cools. As a self-taught baker, there have been several times I’ve created frosting soup (often in the warmer months when the kitchen windows are open to the warm humid air!) and only panicked for a few moments before realized I can fix buttercream in the fridge or freezer anytime.
A Final Note on Learning Buttercream
Buttercream gets better with repetition. The more often you make it, the more intuitive the texture becomes — and the less you rely on exact timing or tools. Start by making a Classic Vanilla Buttercream Frosting so you get a better idea of what to expect. Then, you can venture into adding things like chocolate, cherry, raspberry or even lime. Once you have a handle on how to cream buttercream properly, the flavor options are limitless!
Now that you’ve been educated creaming buttercream properly stops feeling fussy and starts feeling forgiving.
That’s when it becomes a pleasure to make.

Hope you enjoy this! Many of the links in my posts—or found here on ShopMy—may provide me with a small commission and can also lead to sponsorship opportunities. You can also support my work by buying me a coffee. Know your presence and support is received with so much gratitude.